Session and User Labels
In GlarAssist, you can create two types of labels, the Session Labels, and the Users Labels. Labels are used to describe and categorize information on tables. This gives the possibility to users of having a clearer view of the assistance sessions that happen and of all the members of the organization.
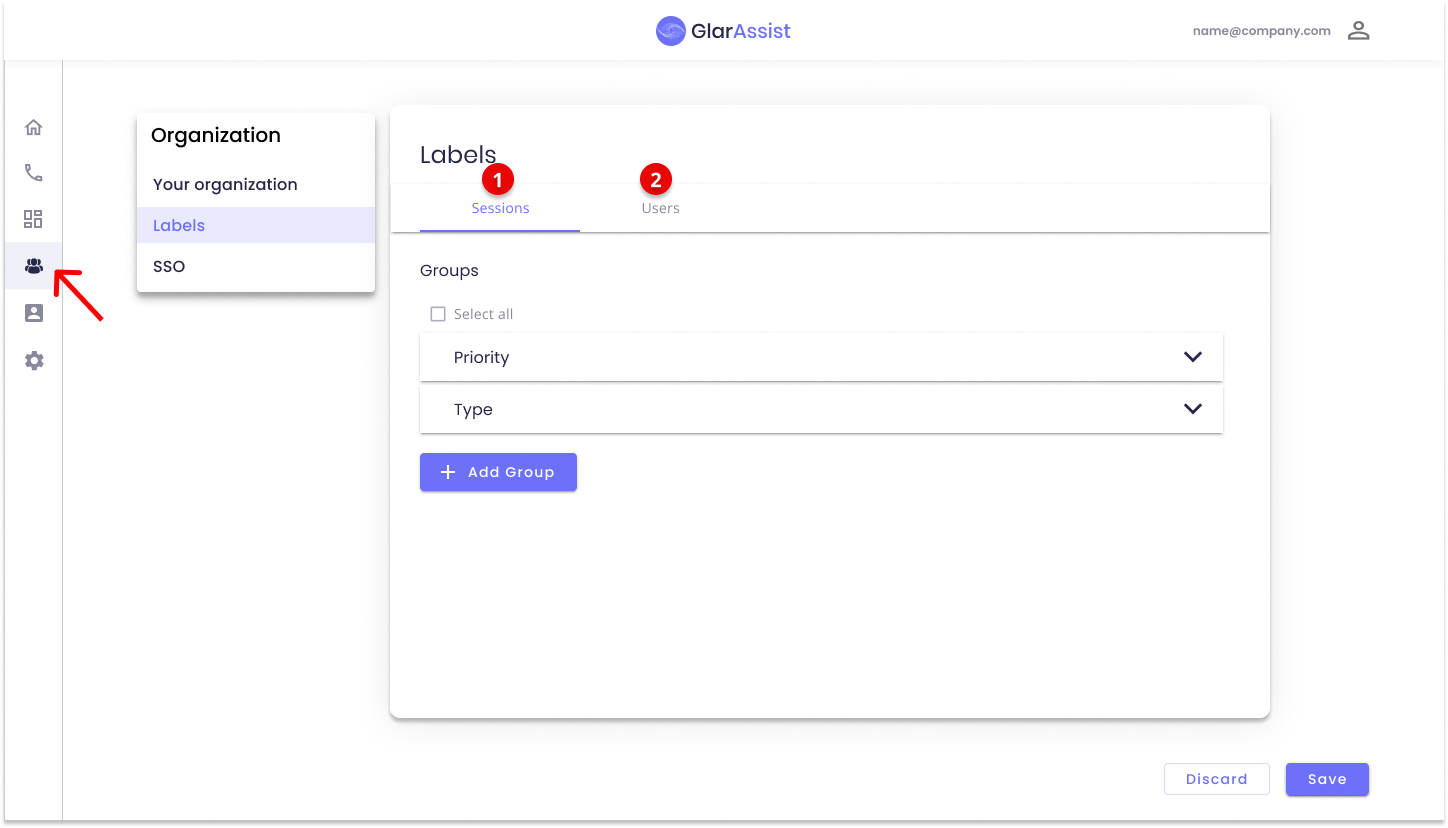
The labels section created in the Organization > Labels > Session (1) tab will be used to define and categorize the sessions. The labels will be used on sessions' history and analytics. Whereas, the labels created on the Organization > Labels > Users (2) section will be used to define and categorize users when organizing information under the "organization" tab.
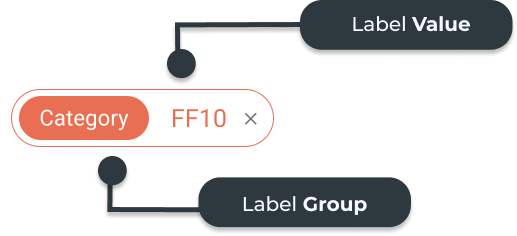
Labels aim to organize information in groups and subgroups. These are defined while creating labels on the organization tab, and are called "Labels Groups" where, inside a group, there are several "Label Values". They will be presented as following:
How to set up and use Session Labels?
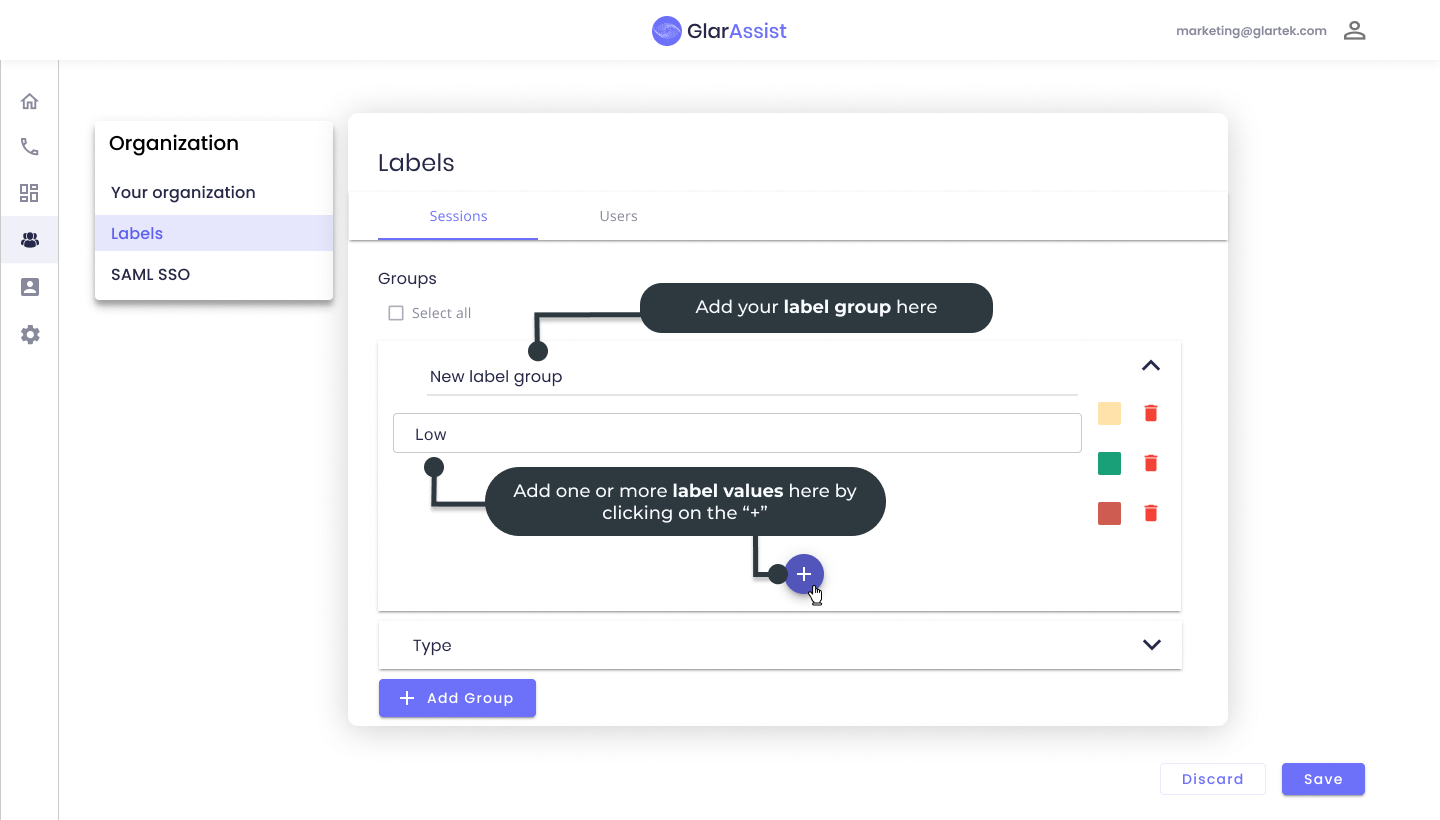
The session tab allows you to create labels to organize all your teams' sessions. The group is used to categorize the labels, and each group can have labels with different names and colors for a better understanding.
After creating the label groups and defining the label's values you can now start using them. For that, go to the initial menu on the left, and access the sessions' history to assign the labels to sessions.
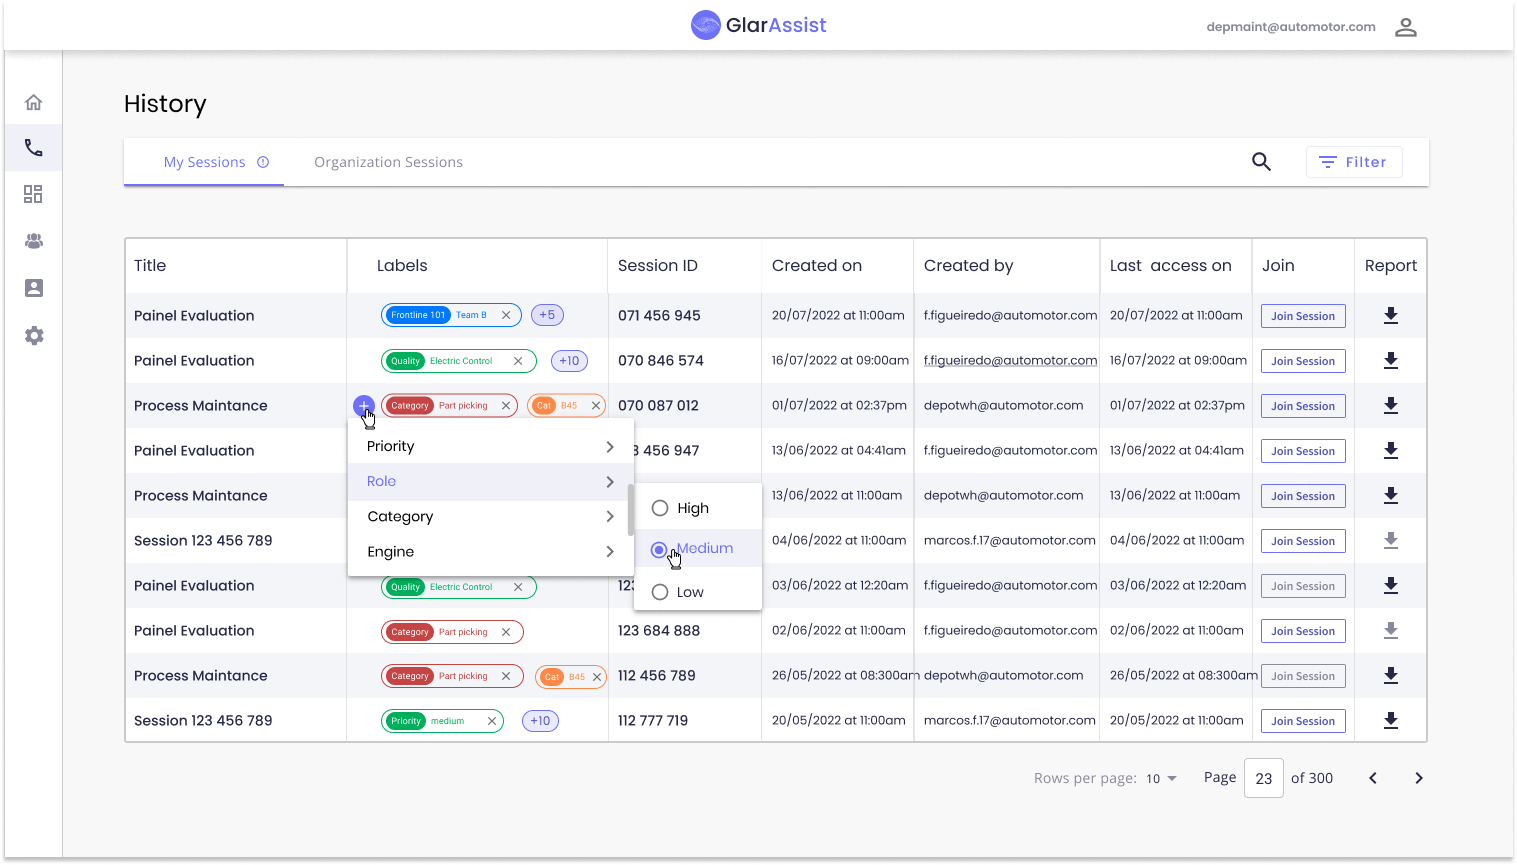
At this stage, you can add your labels to your GlarAssist session information. Once all edition is completed, you either save or discard the changes.
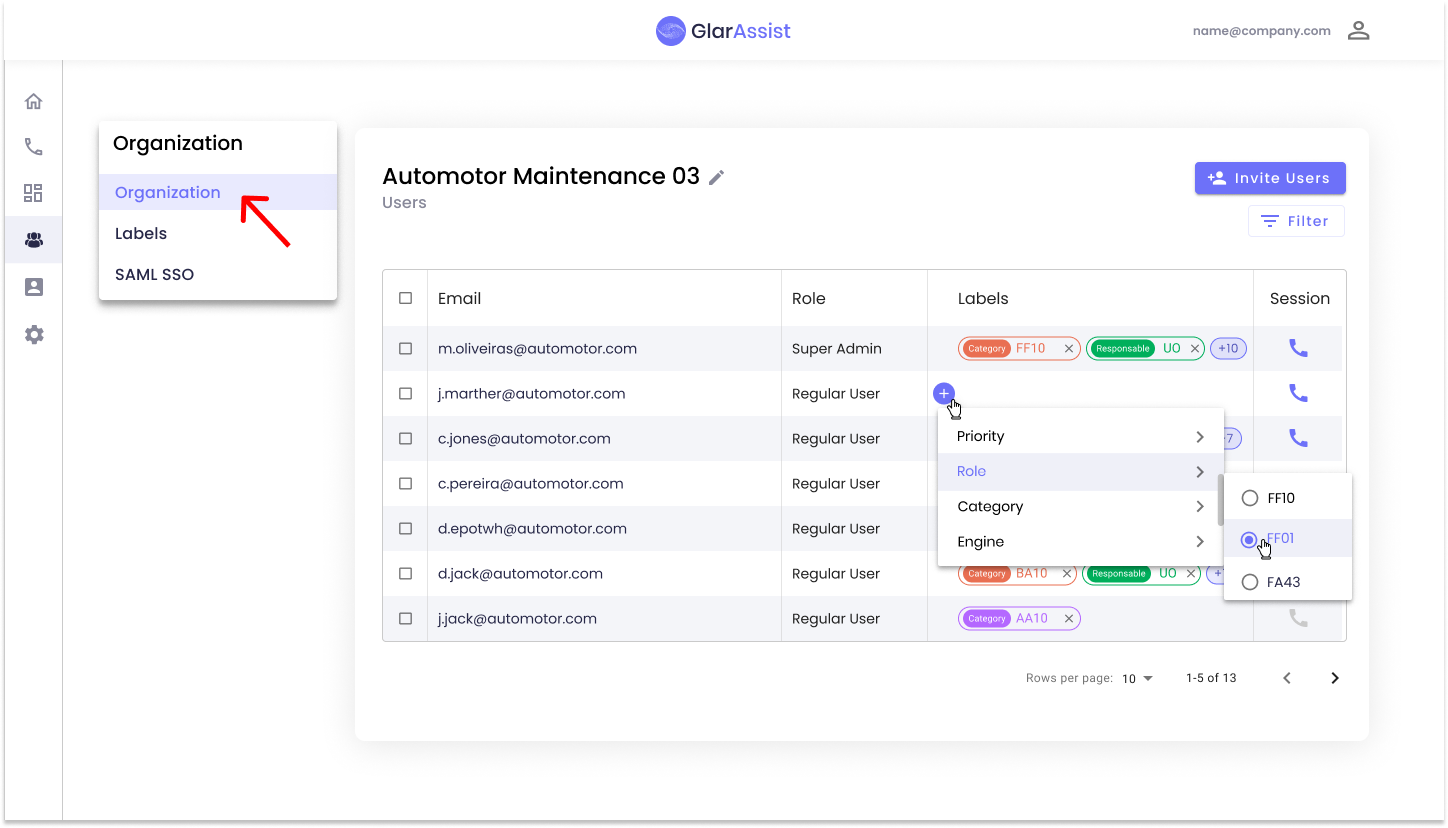
To edit the session label field, simply move the cursor to the field and click to edit. When pointing the mouse over the label cell, a plus ("+") will appear. When clicked on, you can edit the group of labels and if there is more than one label, the number of labels will appear in the corner corresponding to the session.
How to set up and use User Labels?
To be able to create a user label in GlarAssist, after logging into the platform, in the main menu go down to the organization tab. In the tab, choose the label tab, as presented in the example below.
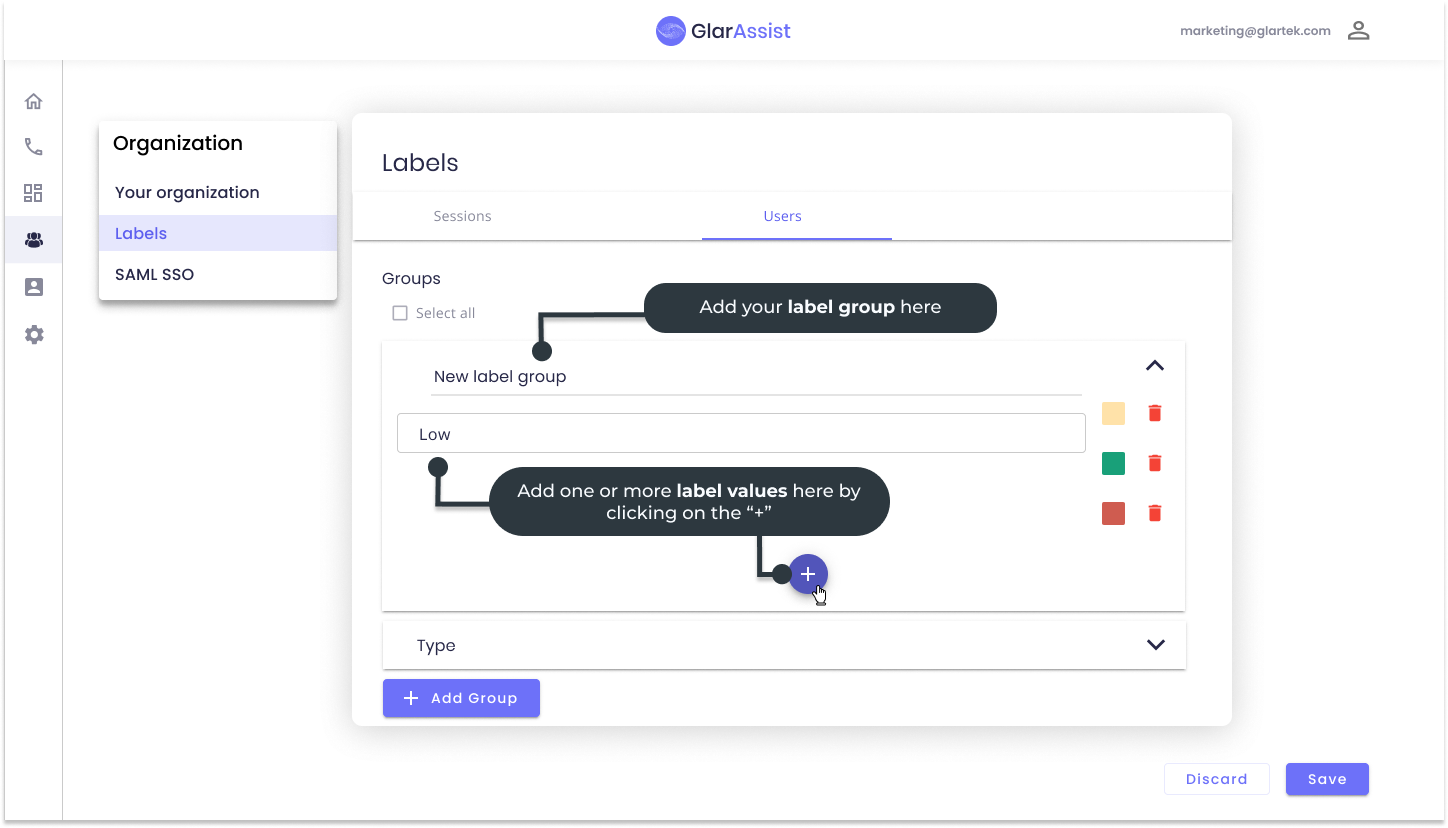
In labels, click on the User tab to access the space for creating labels. In the space, click the purple button "+ Add group".
When clicked, space will appear to add the name and the "label value". For each Label value, the user can set a specific color of his choice to facilitate interaction.
You will be able to add several "label values" to each created group.
After creating the groups of labels, in the initial menu on the left, access the session history to assign the labels to the sessions.
The attribution of labels is made in the tab label, clicking in the blank space the sign "+".
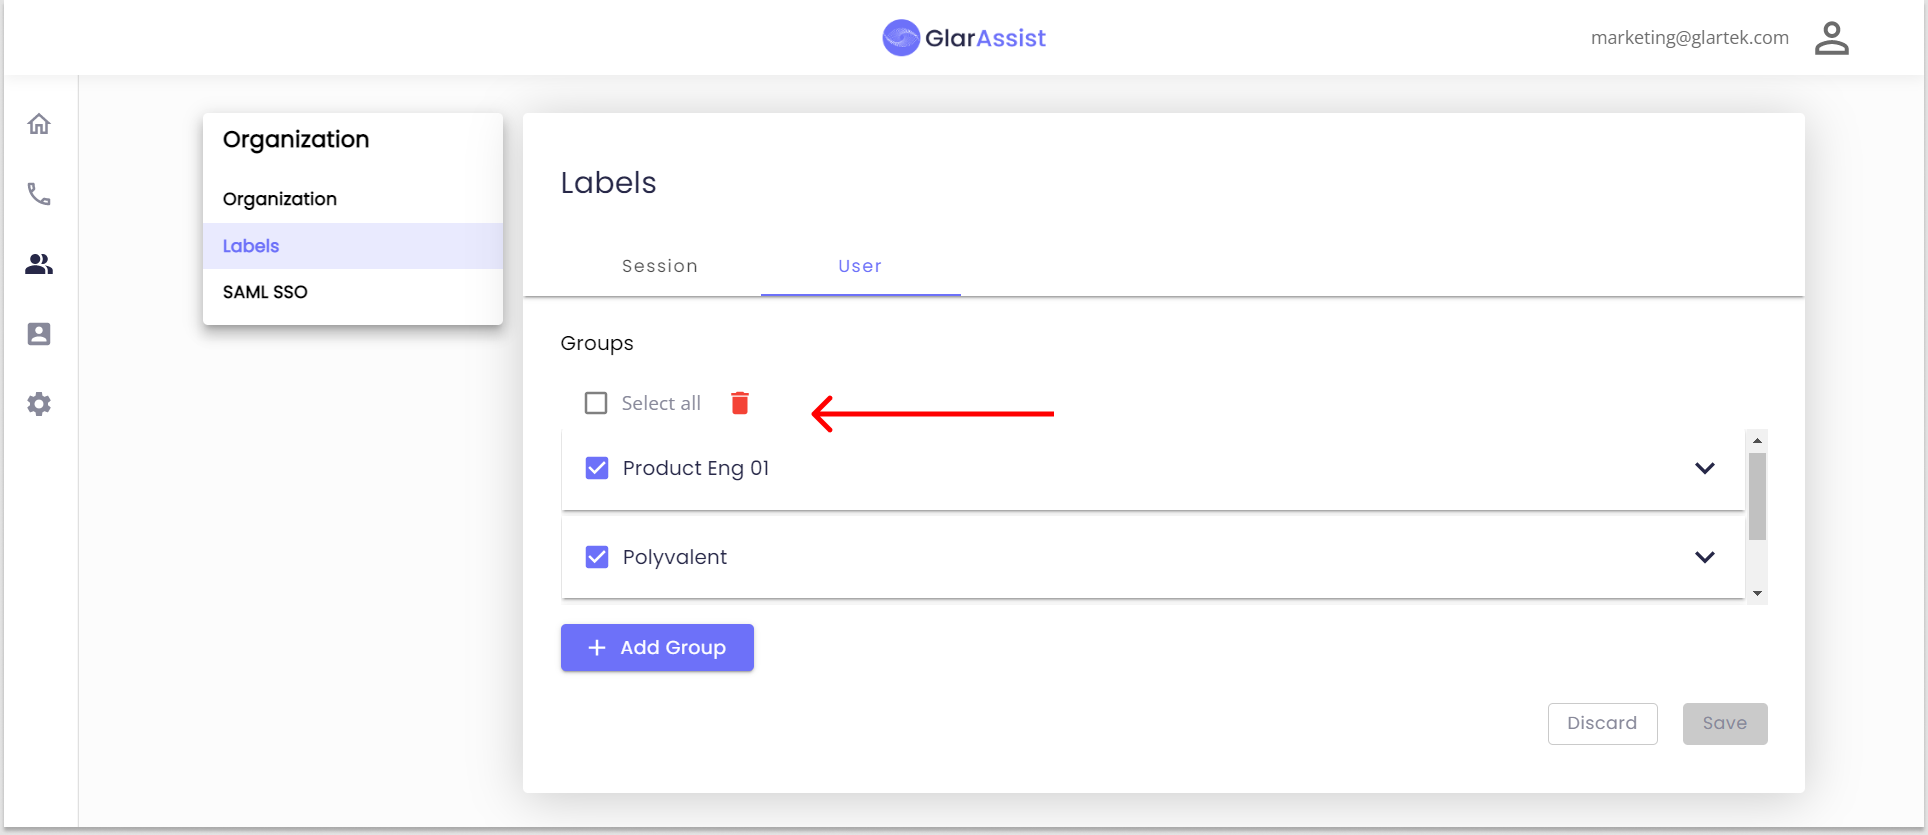
Delete and Save Label
The admin can easily delete groups by selecting them and clicking delete.
After any changes are made in GlarAssist, and after clicking on the save button, a validation message will appear to ensure everything is correct.
Note:
- Only the admin of the organization will have access to this menu.
- The user of its organization will use only the labels already defined by the organization.
- If the user changes the organization, the labels in the organization will be changed to the same as the new organization.