Procedure Digitalisation Quick Start
How to start your digitization journey on the platform?
The Connected Worker solution provides frontline workers with digital tools to increase execution accuracy, optimize efficiency, and enhance safety. The solution provides customizable work instructions, checklists, and other forms of guidance to help you ensure operational efficiency. But first it's necessary to digitalize your procedures. Let's start!
Step 1: Create a Template
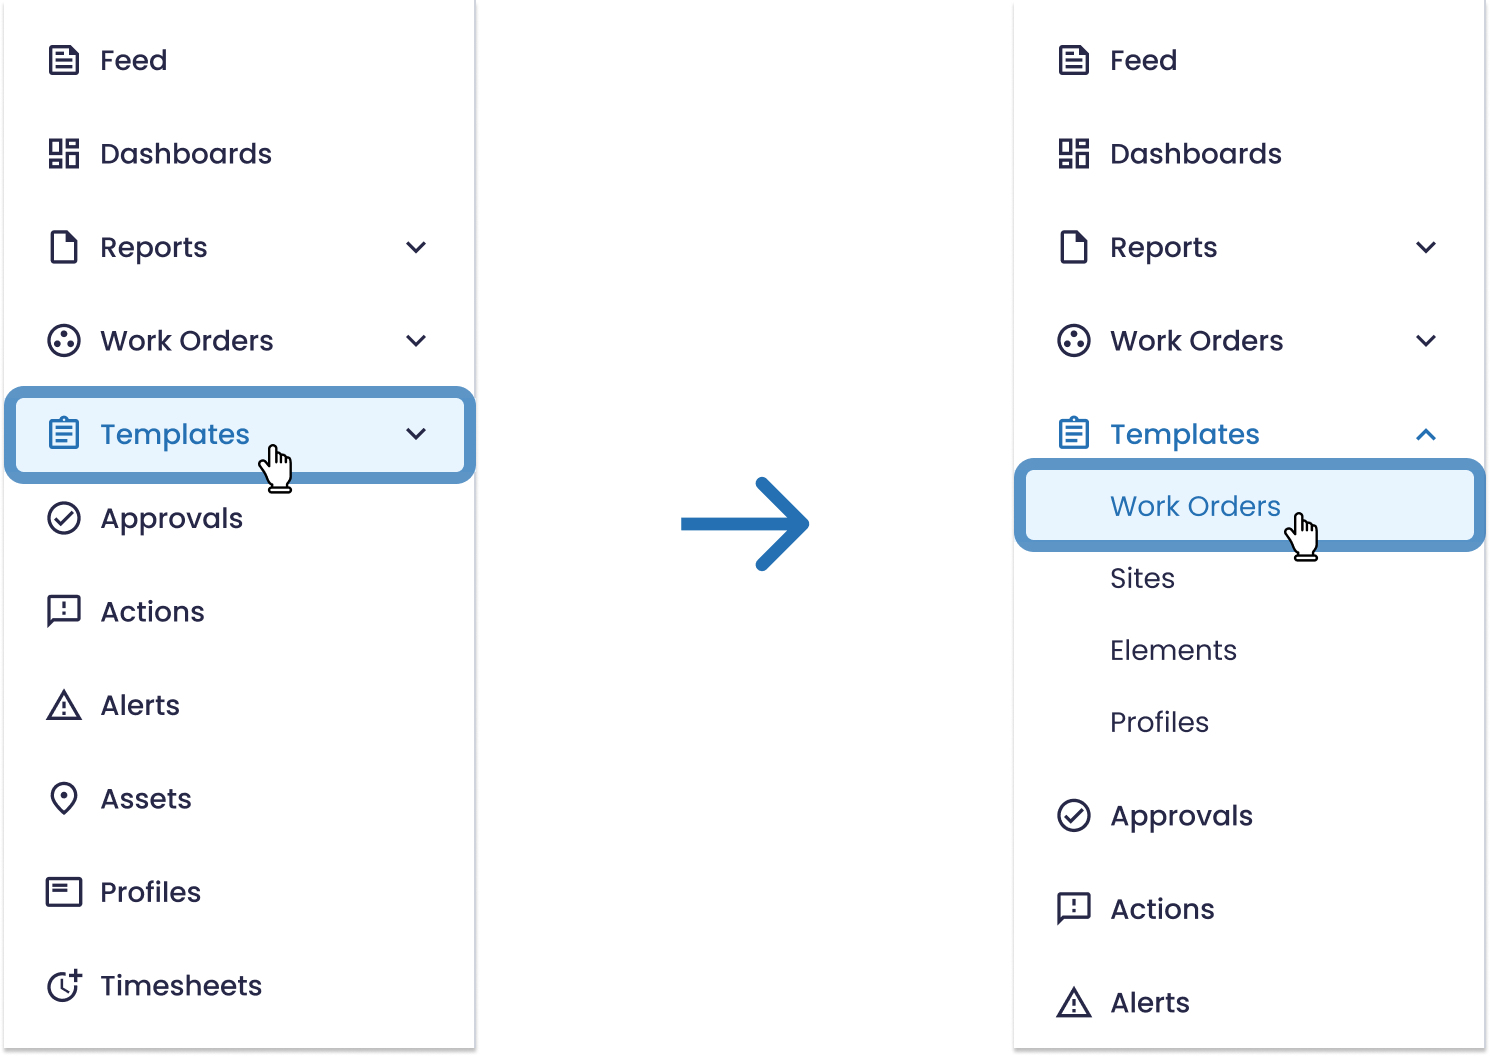
Go to the left main menu and select the "Templates" tab. Then, inside that category choose "Work Orders".
The work order templates window will open and there you can see all the template folders already created (if you have already created any).
If not, to create a new template you must first create a folder.

Then, when you enter the folder you've created or a previously created one, just click on the "Create New" button on the top right corner.

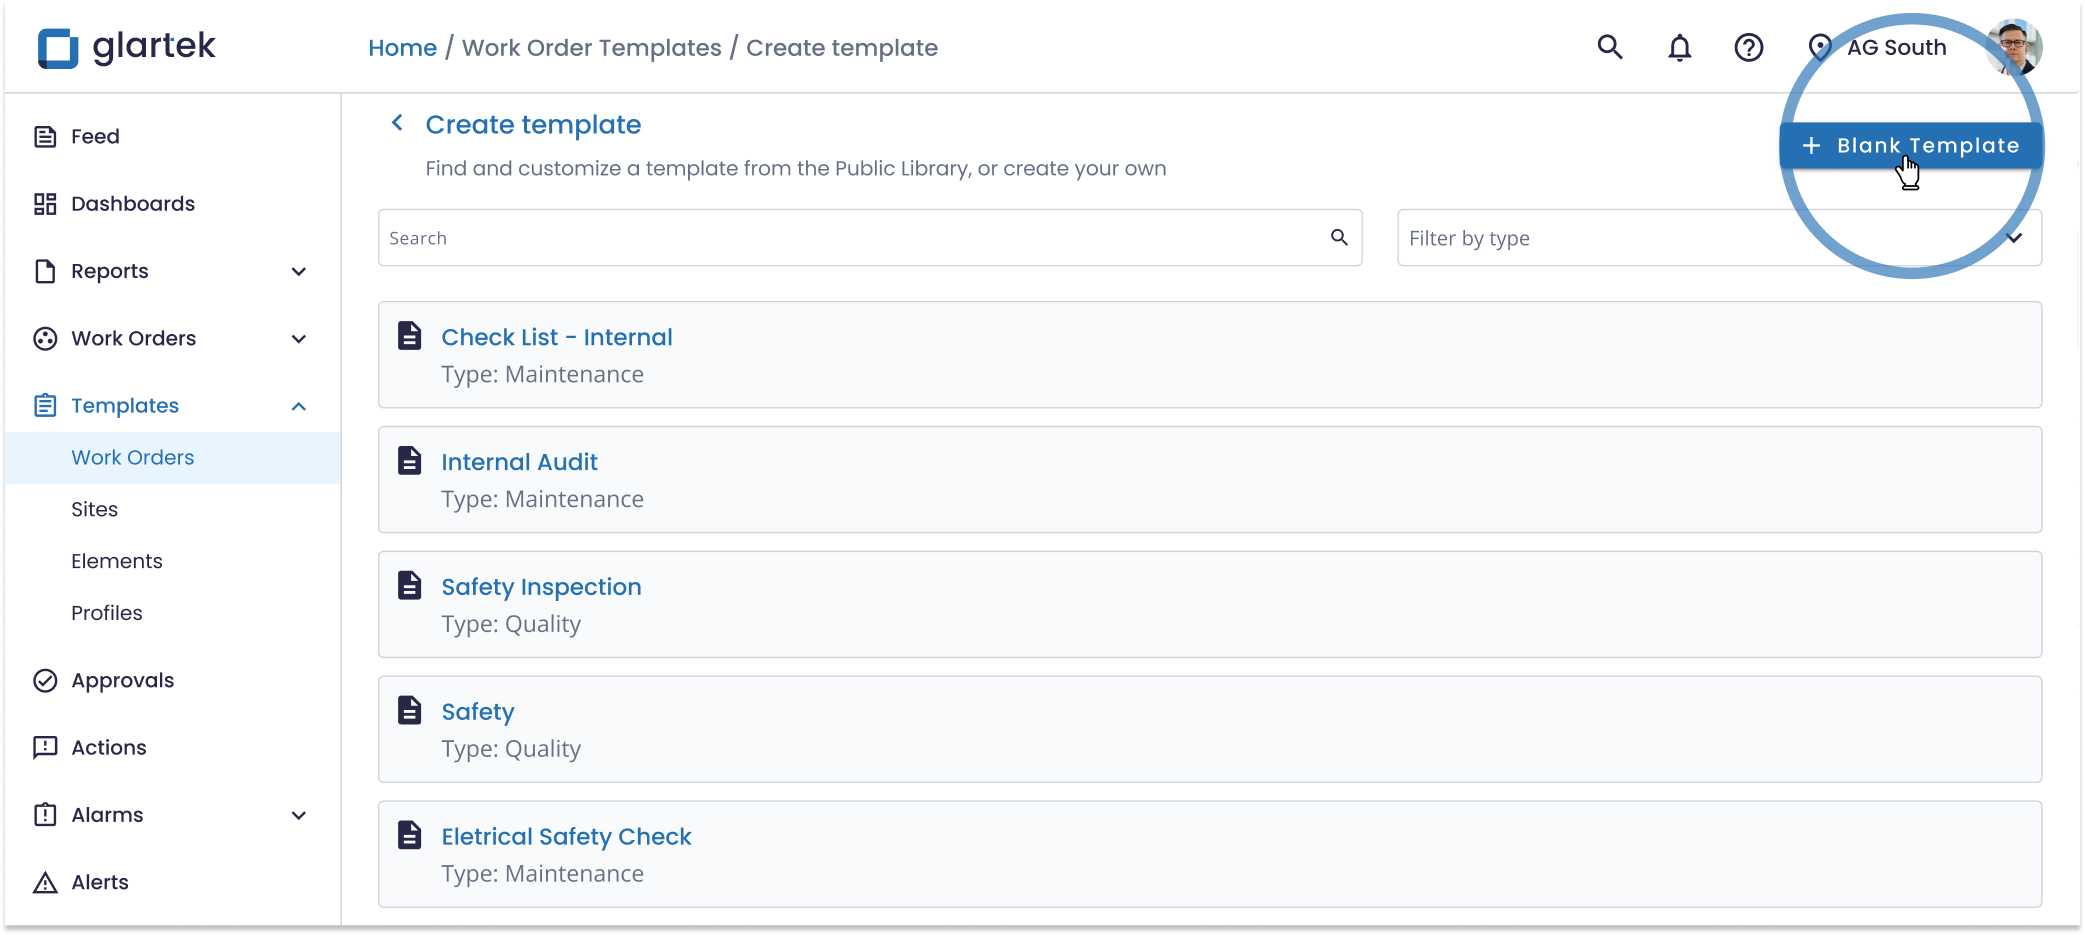
After this, a template library will appear. Here you can choose a preset template to edit or create a new one from scratch.
To create a new template form the scratch, just click on the "Blank Template" button.
Edit the Template
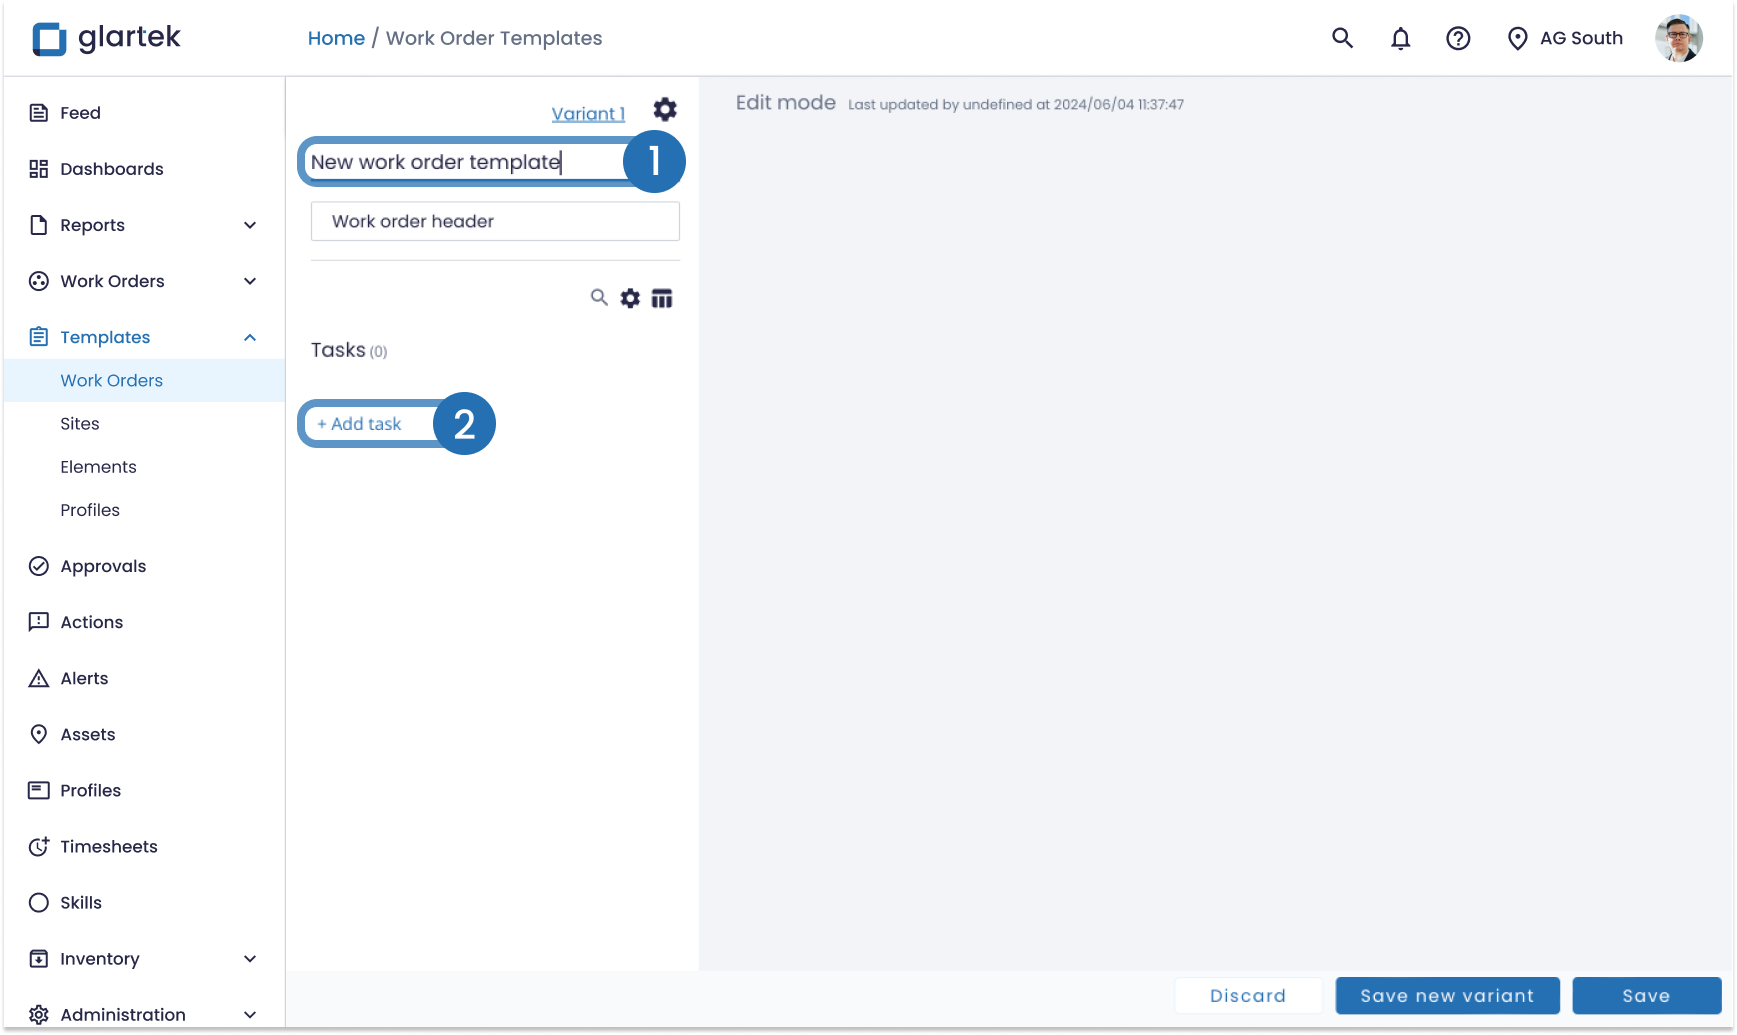
After create a new template, you are able to edit the name, create tasks, add questions and instructions, and configure other settings of your template.
2. Create the tasks you want to include in the procedure template
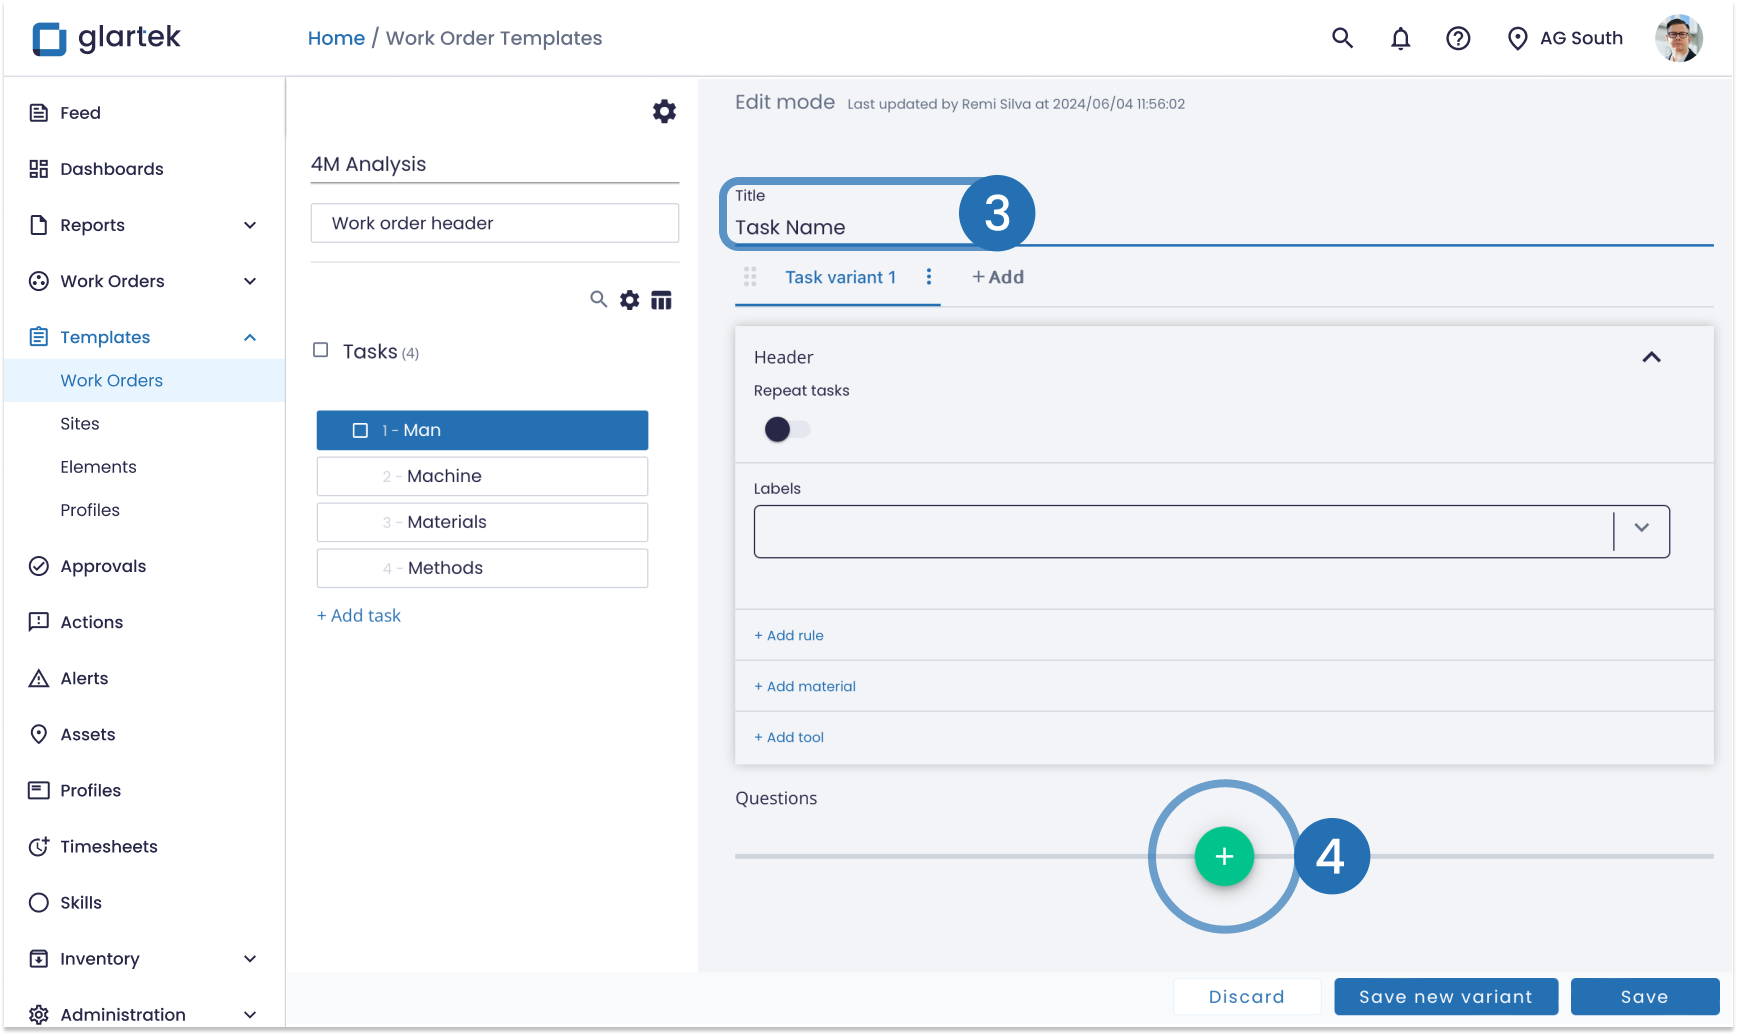
3. Add a title to each task
4. Add questions, instructions, and files to your task
To know more on how to do all these steps click here.

After editing and completing your procedure template don't forget to save it by clicking on the "Save" button.
You can then find your template in the folder where you created it, ready to be used to create a work order. You can edit it again as often as you like.
Step 2: Create a Work Order
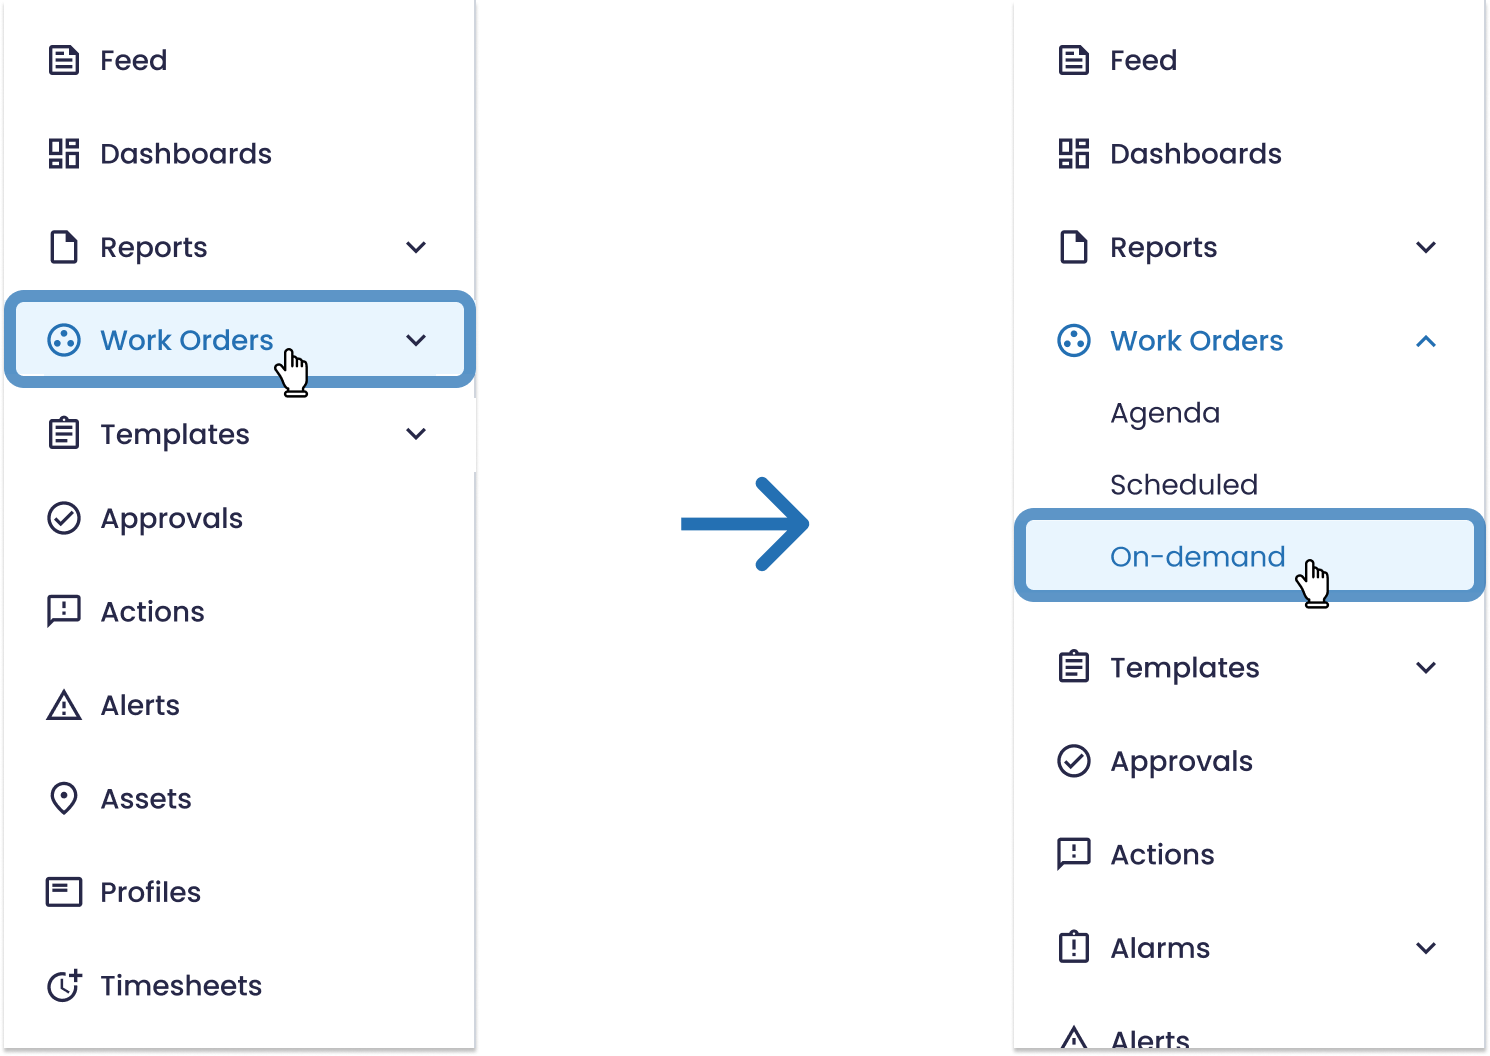
To create a work order, navigate to the left menu and select "Work Orders". Then click on "On-Demand".
A new window will appear where the work order folders are displayed.
Select the folder in which you want to place the work order or create a new folder by clicking on the "New folder" button in the top right corner.
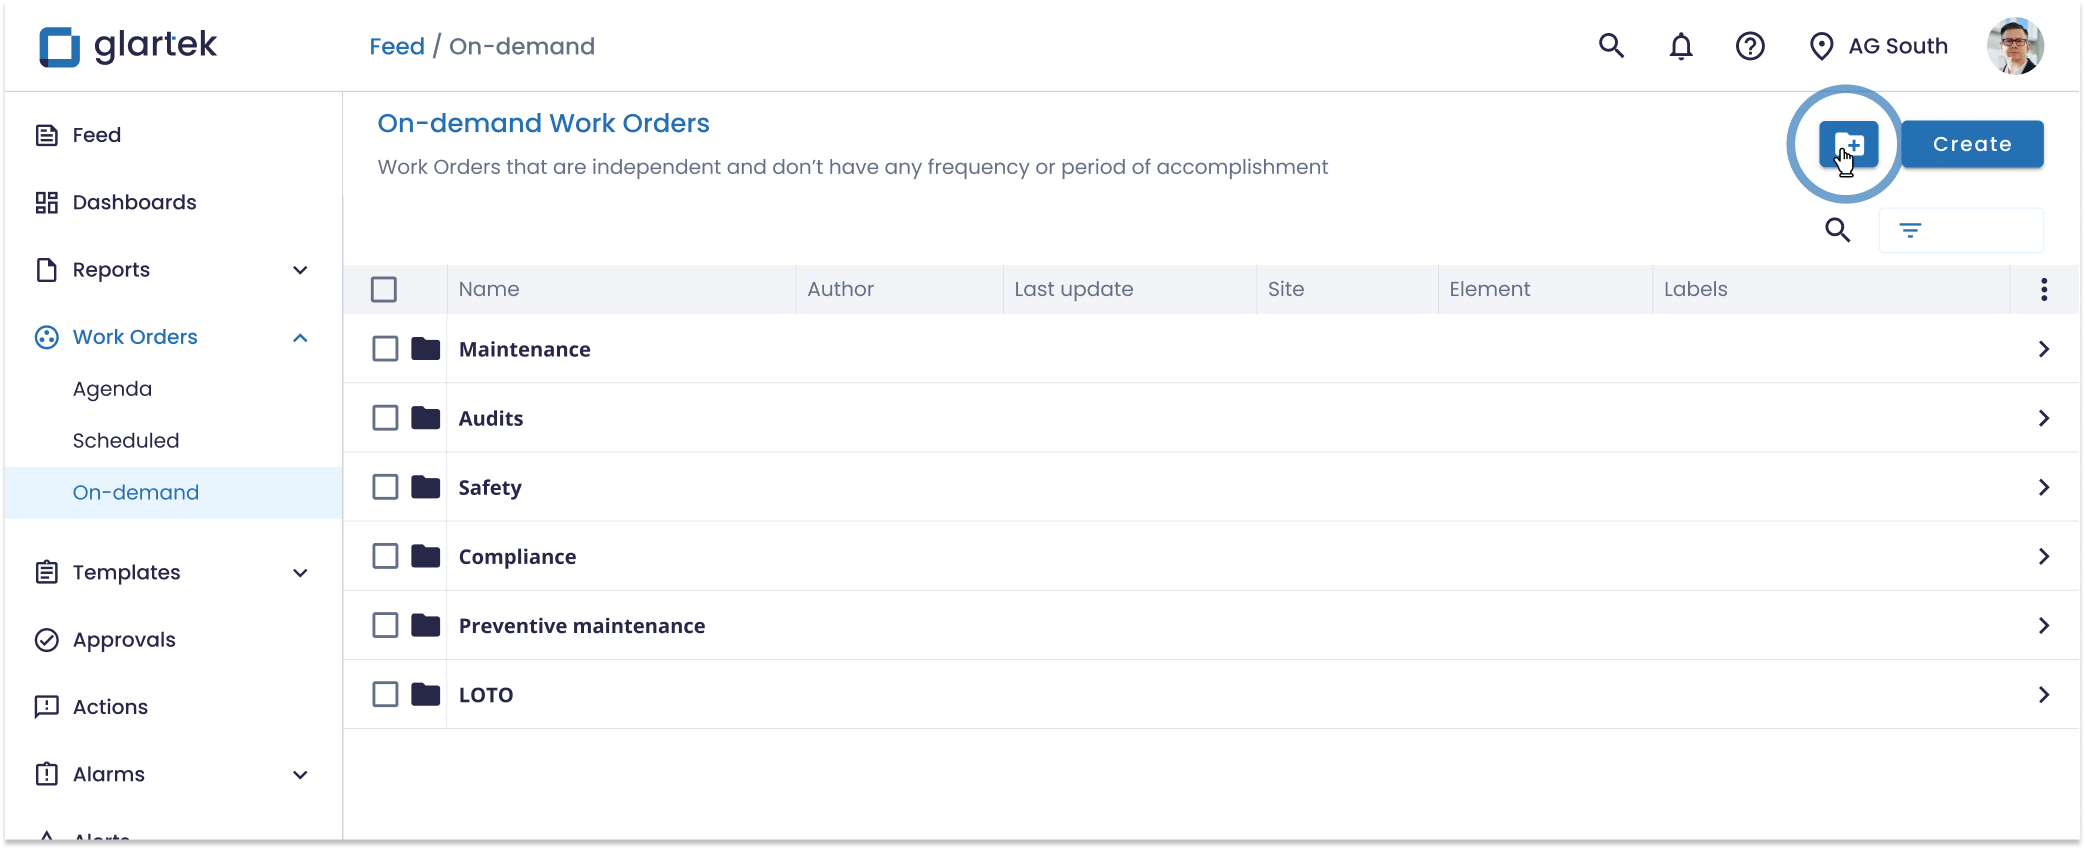
Then open the newly created folder by clicking on it. Once inside the folder, select the “Create” option, to create a new work order.

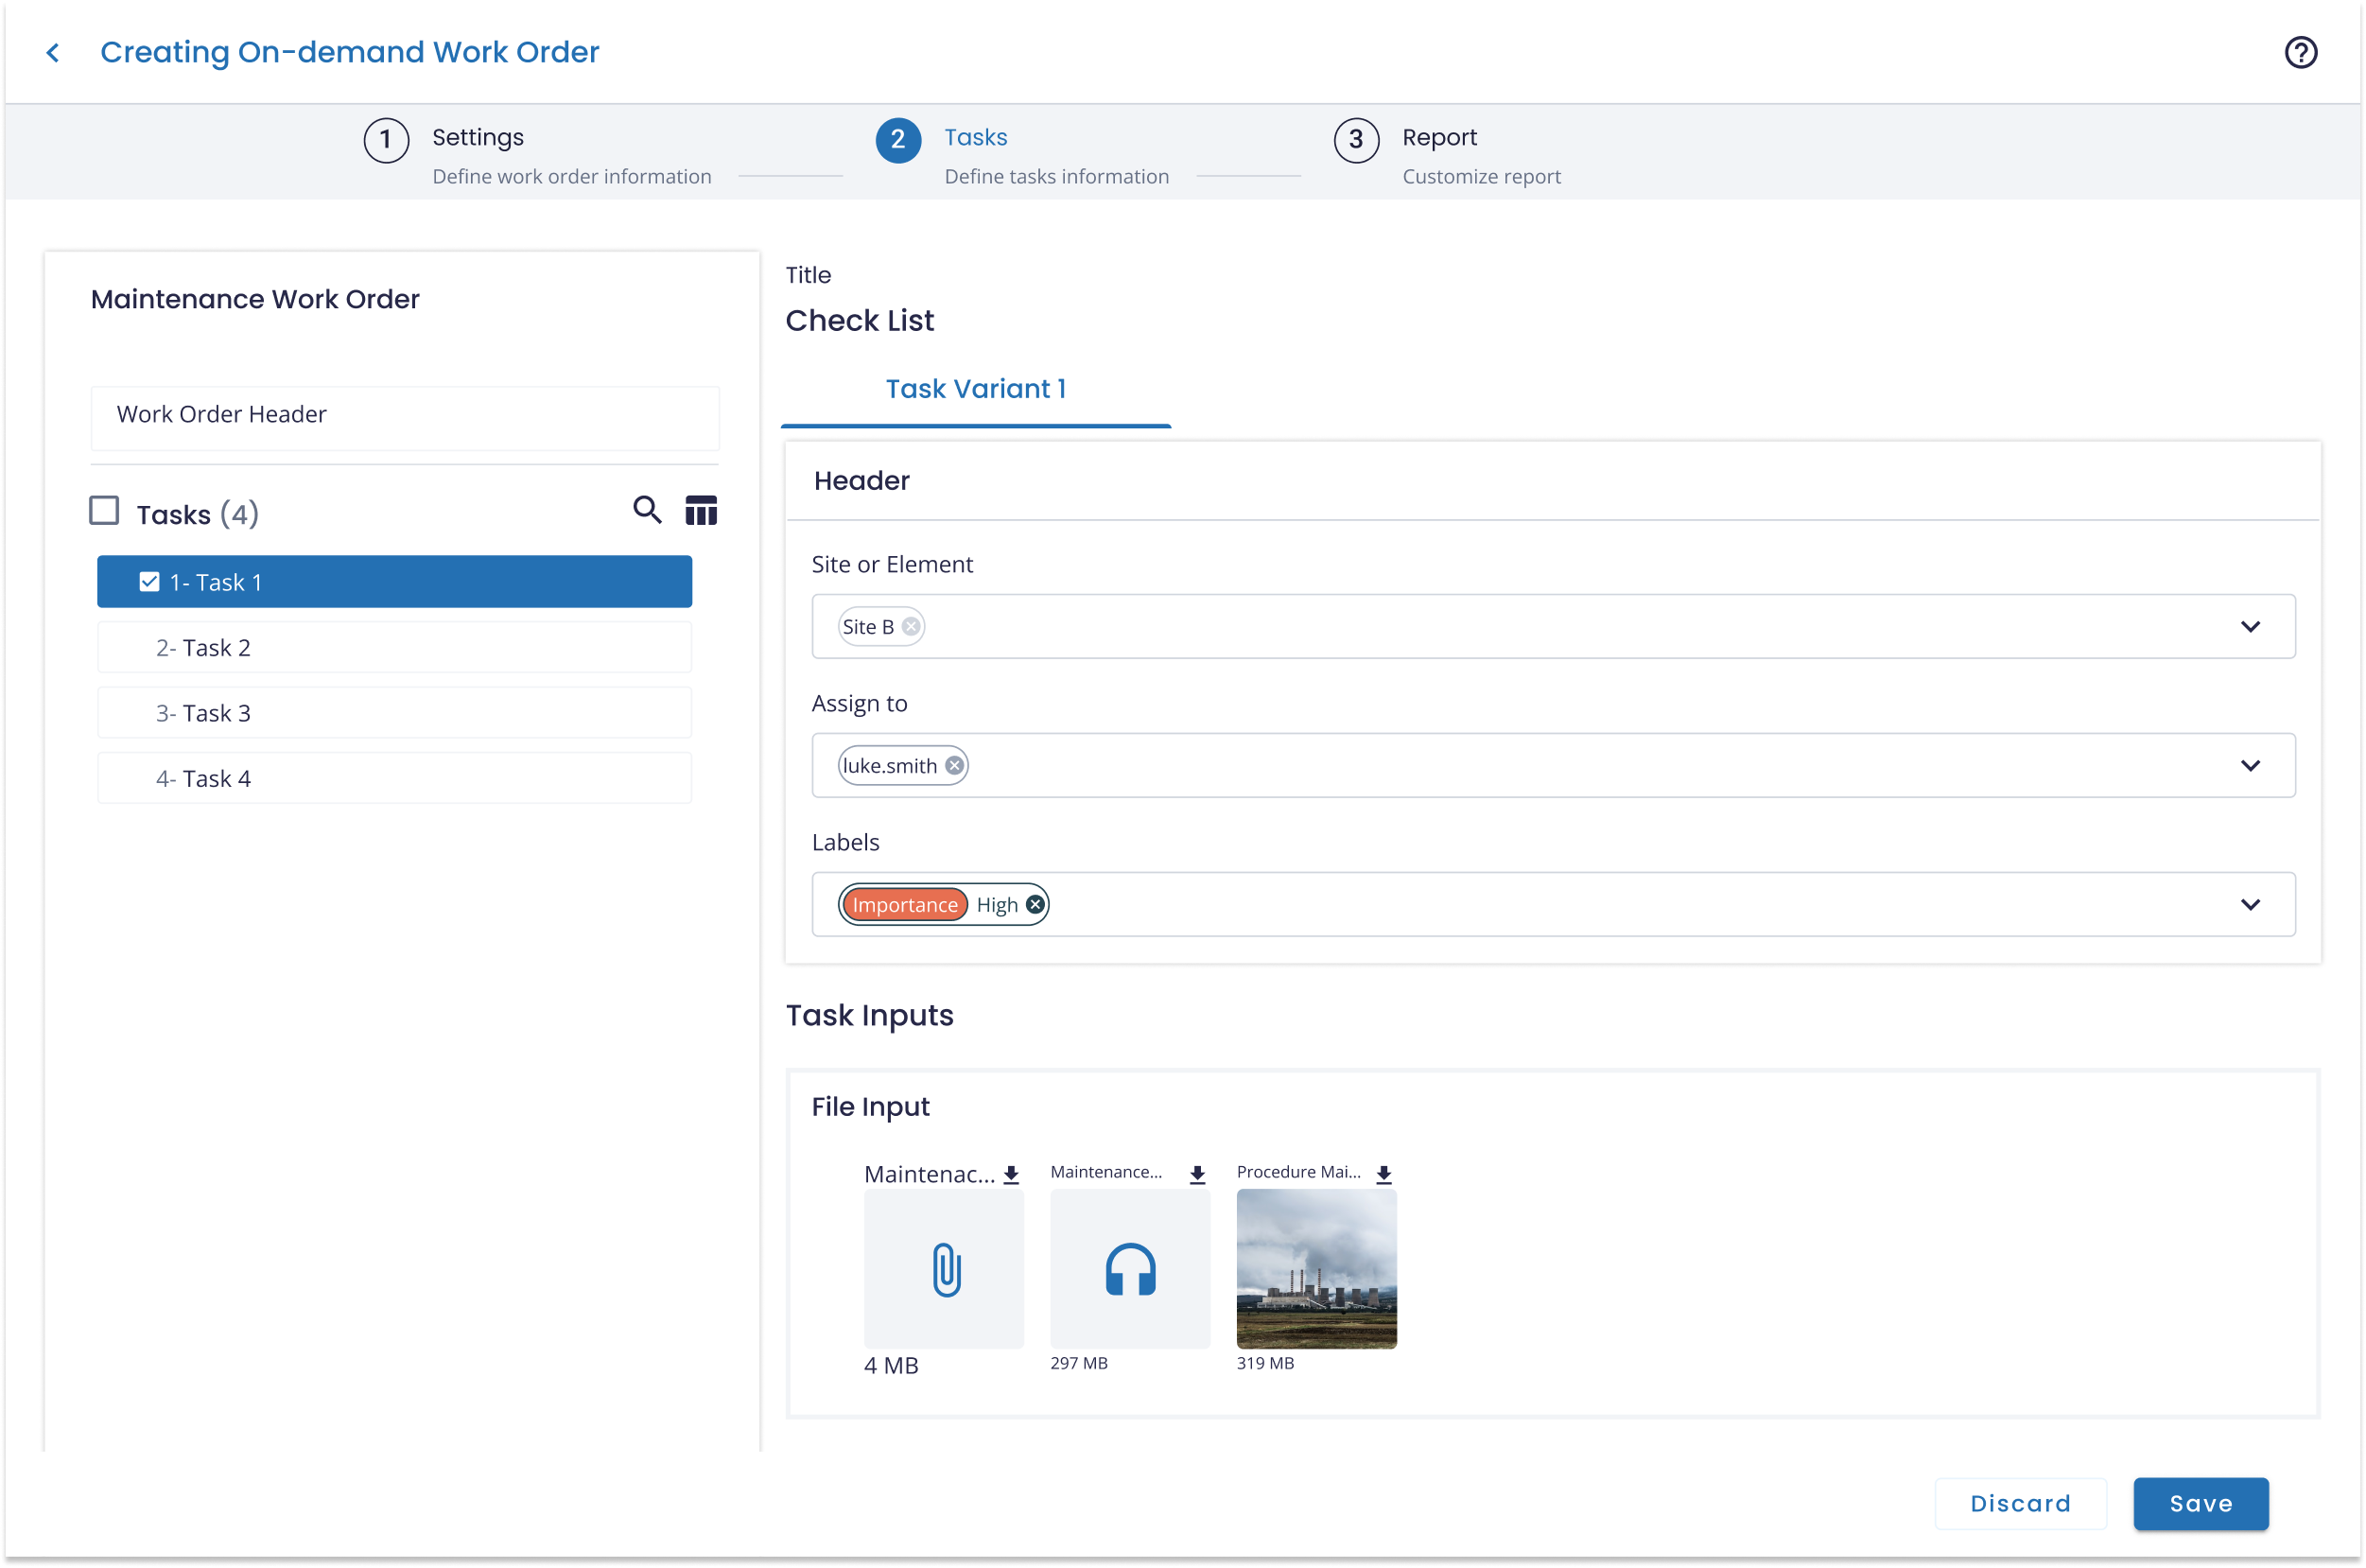
A new window will appear where you can define the settings of your new work order. Here you can define work order information, such as:
- Title of the work order
- Template that will be used
- Assigned worker and teams
- Site where it will be conducted
- Labels for better organization

After completing all the required inputs in the settings step, select “Next” to advance to the second configuration step, where you going to be able to see a preview of all the tasks that are included in the work order.
If needed, you can customise each task individually. To know more click here.
When you have finished configuring the work order click on the "Save" button in the bottom right corner and the are saved and the issue is created.
Step 3: Execute the Work Order
The execution of the procedure is the moment in which the worker is ready to perform a task assigned to him. To access the digitized procedure guides and workflows the worker will have to enter the platform through their device (PC, Smartphone, Tablet, Smartglasses, Augmented Reality glasses, or stationary screens).
If you have any questions please submit a ticket to request technical support.